
Short answer
In the Finder, Control-click the photo and choose Quick Actions › Remove Background (on macOS 27, it’s under More). In Preview, open the photo and click the Remove Background button. In Photos, Control-click a photo and choose Copy Subject, then paste the cut-out where you need it.
Need it on pure white, or a store-ready square? See how Ricly does it ↓
Four ways at a glance
| Method | Where | What you get | Price |
|---|---|---|---|
| Finder | Control-click › Quick Actions › Remove Background | The background removed; photos above about 12 MP come out at about 12 MP | Built in |
| Preview | The Remove Background button | The background removed, in a PNG if you accept the conversion | Built in |
| Photos | Control-click › Copy Subject | The subject copied, ready to paste | Built in |
 Ricly Ricly | Right-click › Ricly › Remove Background | A transparent PNG, a white JPG or a store-ready square, next to the original | 10 images a month free |
Remove a background in the Finder (built in)
- Control-click the photo in the Finder.
- Choose Quick Actions › Remove Background.
Which Quick Actions you see depends on the file type and the Finder extensions you have turned on.
What we measured. Photos above about 12 megapixels came out scaled down to about 12 MP; smaller ones kept their size. When the Finder found no subject (a small bird in foliage, pale headphones on a two-tone background), it saved nothing and showed no message. It was also faster than Ricly, and did better on a group photo and on dark hair against a dark background.
Measured October 2026 on a MacBook Pro M1 Pro, macOS 15.7.
Remove a background in Preview (built in)
- Open the photo in Preview.
- Click the Remove Background button.
- If Preview asks to convert the document to a PNG file, click Cancel and choose File › Duplicate to keep the original, or click Convert to change the original.
To undo it, choose Edit › Undo.
Steps from Apple’s Preview guide: Remove a background or extract an image.
Copy a photo’s subject in Photos (built in)
- Open a photo in Photos.
- Control-click it, then choose Copy Subject.
- Paste the subject into a document, an email, a message or a note.
Share Subject, in the same menu, sends just the subject in a message, an email and more.
Steps from Apple’s Photos guide: Isolate and share a photo’s subject.
The right-click way
Remove a background with Ricly
- Install Ricly and open it. Turn on the Finder extension when it asks (one setting), then create your free account and verify your email.
- In Finder, right-click the photo and choose Ricly › Remove Background. Select several to do them in one go.
- Pick the finish: transparent, white or store-ready. The new file lands next to the original.
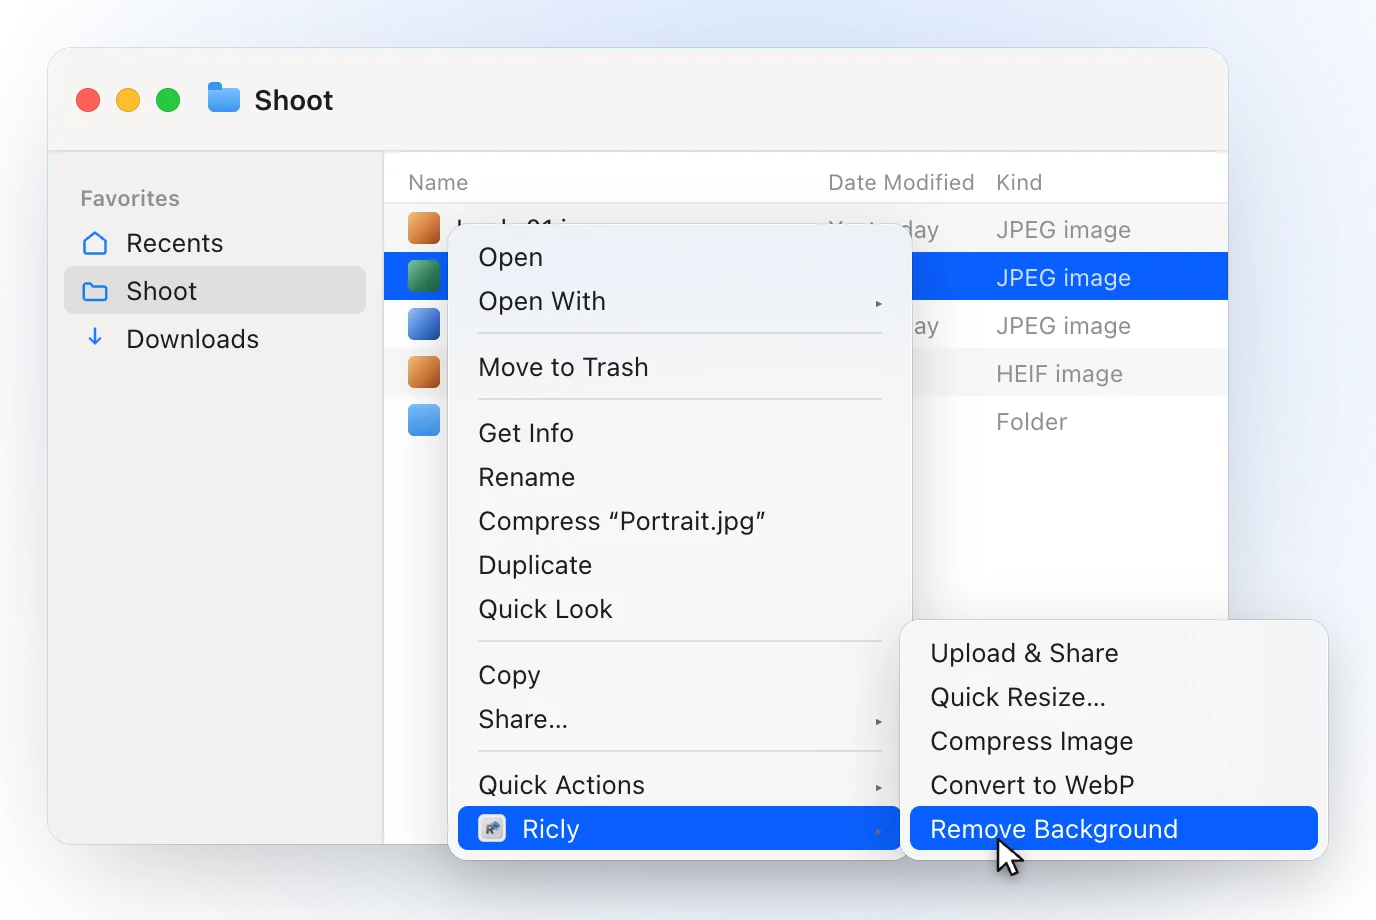
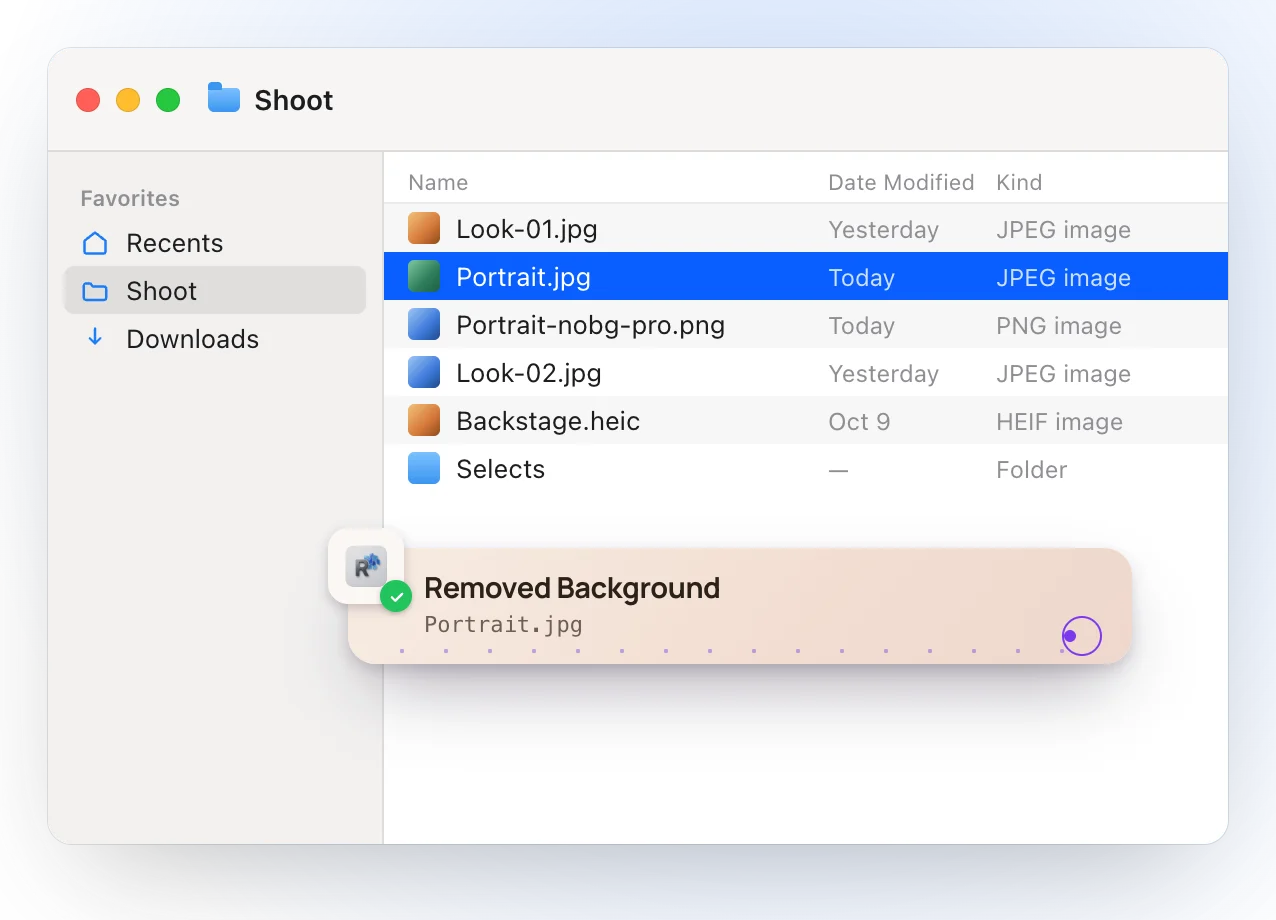
- Transparent gives <name>-nobg-pro.png. White puts the cut-out on pure white, <name>-white.jpg. Store-ready makes <name>-store.jpg, a white square of at least 1,000 px with the subject centered.
- The cut-out keeps your photo’s own size.
- The model is inside the app, so the photo is processed on your Mac. Ricly needs the network to sign you in, not to process the photo.
- Run it twice and you get Portrait-nobg-pro 2.png: nothing is ever overwritten.
- Your original is never modified, moved or deleted.
- Select several photos and each gets its own file; the model works through them one at a time.
Where it falls short. The free plan covers 10 images a month, and a selection larger than what’s left is refused as a whole, before anything starts; Pro removes the limit. It takes JPG, JPEG, PNG, HEIC and TIFF. It needs macOS 13 or later.
Put a product on a white background
For a listing, choose Store-ready in Ricly: the cut-out goes on a pure white square (RGB 255), at least 1,000 px a side, with the subject centered. Pick how much of the square it fills: Tight (95 %), Amazon’s 85 %, or Airy (70 %). White keeps the photo’s own shape on pure white instead.
Remove the background from many photos at once
In Ricly, select the photos and right-click once: the menu reads Remove Background (30 files), you pick the finish once, and each photo gets its own file, named so nothing overwrites anything. Every image counts toward the free plan’s 10 a month; Pro has no monthly count.
Which one should you use?
Removing a background on a Mac: common questions
How do I remove a background on a Mac without installing anything?
Three ways are built in. In the Finder, Control-click the photo and choose Quick Actions › Remove Background. In Preview, open the photo and click the Remove Background button; if Preview offers to convert it to PNG, choose File › Duplicate first to keep the original. In Photos, Control-click a photo and choose Copy Subject, then paste the cut-out where you need it.
How do I make an image background transparent on a Mac?
In Preview, click Remove Background and accept the conversion to PNG, the format that carries transparency. In Ricly, choose Transparent: you get <name>-nobg-pro.png next to the original.
How do I put a photo on a white background?
In Ricly, choose White for the photo’s own shape on pure white, or Store-ready for a white square sized for a listing. Both come out as a JPG at quality 0.92.
Is there a free background remover for Mac?
Yes. The Finder’s Quick Action and Preview are built in, and Ricly’s Remove Background is free for 10 images a month; Pro removes the limit.
Can I remove the background from many photos at once?
In Ricly, select them, right-click once, and each one gets its own file; the model works through them one at a time. Every image counts against the monthly allowance, and on the free plan a selection larger than what is left is refused as a whole, before anything starts.
Which formats can I use with Ricly?
JPG, JPEG, PNG, HEIC and TIFF. Transparent comes out as a PNG; White and Store-ready come out as a JPG on pure white.
Is my photo uploaded anywhere?
Not with Ricly: the model runs on your Mac. Ricly needs the network to sign you in, not to process the photo.
Remove Background in Ricly →Resize images on a Mac →Compress images on a Mac →