
Short answer
To make a JPEG lighter, open it in Preview, choose File › Export, keep JPEG as the format and lower the quality. To make any image smaller in pixels, choose Tools › Adjust Size in Preview. Photos (File › Export) and the Finder’s Convert Image do it too, and so does the Terminal with sips.
Keeping the same size in pixels, PNG included? See how Ricly does it ↓
Five ways at a glance
| Method | Where | What gets smaller | Many at once | Price |
|---|---|---|---|---|
| Preview | File › Export (JPEG quality) or Tools › Adjust Size | The file (JPEG quality) or the pixels (Adjust Size) | Select them in the sidebar | Built in |
| Photos | File › Export, JPEG Quality and Size | The file, and the pixels if you choose a size | Select them in your library | Built in |
| Finder | Quick Actions › Convert Image | A smaller size, in the format you pick | Select several images | Built in |
| Terminal | sips -s formatOptions | A JPEG’s file, at the same size in pixels | With a script | Built in |
 Ricly Ricly | Right-click › Ricly › Compress Image | The file, at the same size in pixels, PNG and JPG | Select them all, right-click once | Free, no monthly limit |
Fewer pixels or a lighter file?
There are two ways to make an image file smaller. You can make it smaller in pixels: 4000 pixels wide down to 2000, a picture that’s easier to send but less detailed up close. Or you can keep the same size in pixels and store the picture more efficiently, in a lighter file. Preview’s Adjust Size, the Finder’s Convert Image and Photos’ Size do the first; JPEG quality in Preview, Photos and sips, and Ricly, do the second.
Compress an image in Preview (built in)
A lighter JPEG:
- Open the image in Preview, then choose File › Export.
- Set Format to JPEG and adjust the quality.
- Choose a name or a location, then click Save.
Fewer pixels: choose Tools › Adjust Size, select Resample image, then enter a smaller value in the Resolution field. The new size is shown at the bottom.
Several images: open them in one Preview window, select them in the sidebar, then follow the same steps.
Steps from Apple’s Preview guide: Convert image file types, and Crop, resize, or rotate an image.
Good to know. Apple shows the quality setting for JPEG and JPEG-2000. Exporting a PNG as JPEG makes it lighter, but it becomes a JPEG, and JPEG has no transparency. To keep the original as it is, work on a copy (File › Duplicate in the Finder).
Compress photos in Photos (built in)
- In Photos, select the photos.
- Choose File › Export › Export Photos.
- Set Photo Kind to JPEG, click the arrow beside it, then choose a JPEG Quality and a Size.
- Click Export and choose where to save them.
Your originals stay in your library.
Make an image smaller in the Finder (built in)
- Control-click the image in the Finder.
- Choose Quick Actions › Convert Image (under More on macOS 27).
- Pick a format and a size.
Apple describes it as converting an image to another format or a smaller size.
Compress a JPEG in the Terminal
macOS includes sips, which can re-save a JPEG at a lower quality:
sips -s formatOptions 70 photo.jpg --out photo-small.jpg
On our test photo, 686 KB came down to 582 KB, at the same 2000 × 1332 pixels. We tried it on macOS 15.7. A lower number means a lighter, rougher file.
The right-click way
Compress images with Ricly
- Install Ricly and open it. Turn on the Finder extension when it asks (one setting), then create your free account and verify your email.
- In Finder, select the PNGs or JPGs and right-click: choose Ricly › Compress Image.
- Each lighter copy lands next to its original, with -compressed added to the name.
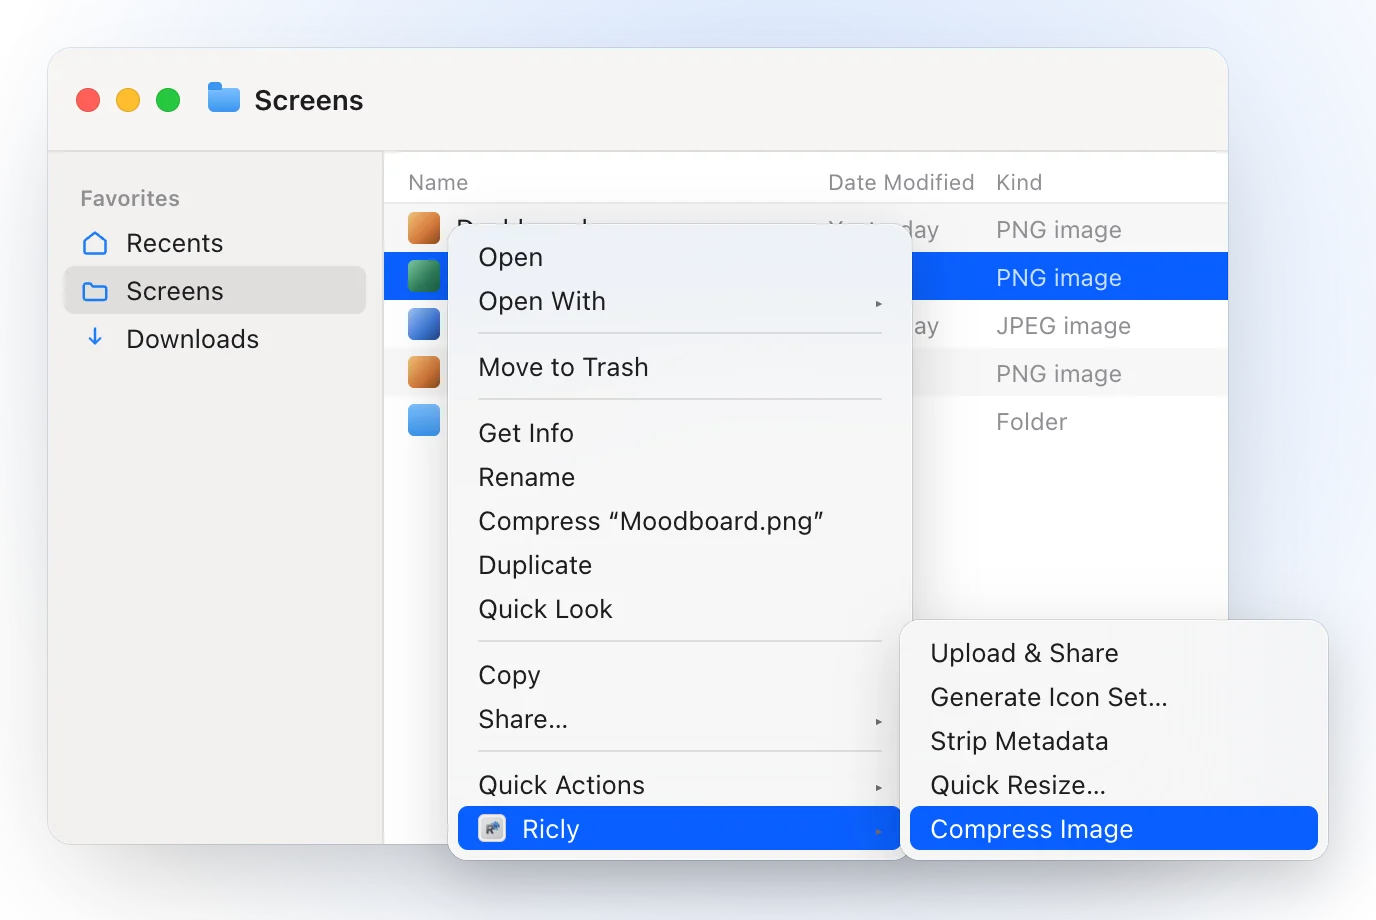
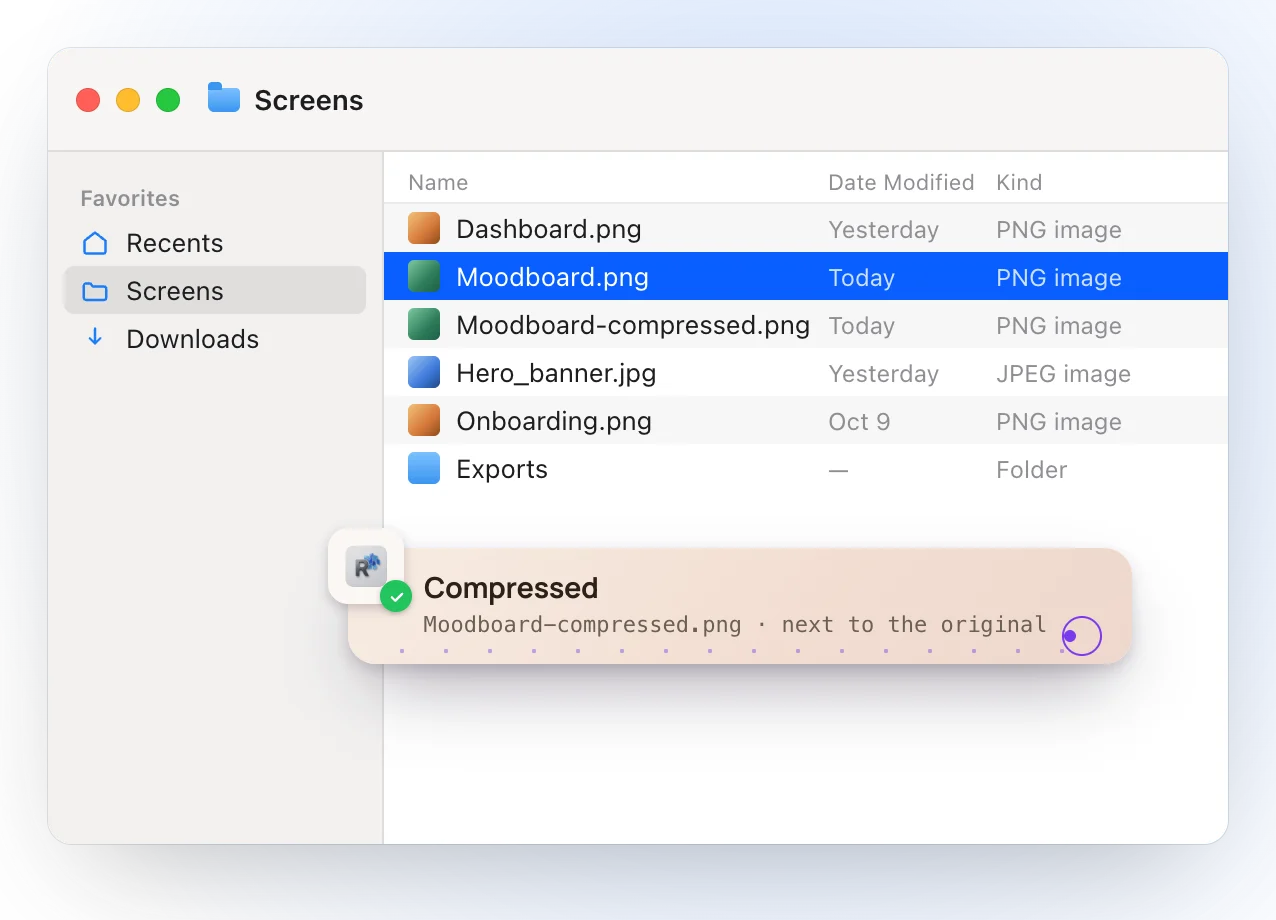
- Same size in pixels, a lighter file, for PNG and JPG alike.
- A PNG with 256 colors or fewer comes out with nothing lost at all. Above that, no color channel moves by more than two levels out of 255, and gradients and transparency come out exact.
- A JPEG is re-encoded only when it was saved at a high quality, and each copy is checked against the original before it’s kept. Its orientation, color profile, date and camera details come along.
- If a copy isn’t at least five percent lighter, nothing is written, and Ricly tells you so.
- Your original is never modified, moved or deleted; if the name is taken, you get a numbered file.
- Four images at a time, and no monthly limit.
- Everything happens on your Mac. Nothing is uploaded.
Where it falls short. It takes PNG and JPG only: convert a HEIC to JPG first, in the same menu. There’s no quality setting and no size target; for a file size limit, use Quick Resize › Under…, in the same menu. A JPEG that’s already compressed is left as it is. It needs macOS 13 or later.
Compress many images at once
In Ricly, open the folder, select the images (⌘A selects everything in the window) and right-click once: the menu reads Compress Image (20 files), and each image gets its own lighter copy beside it. Built in, you can select several images in Preview’s sidebar, in Photos or in the Finder, or loop sips in a script.
Which one should you use?
Compressing images on a Mac: common questions
How do I reduce the file size of a photo on a Mac?
In Preview, choose File › Export and lower the JPEG quality, or choose Tools › Adjust Size for fewer pixels. Photos lets you choose a JPEG quality and a size when you export. Ricly makes a lighter copy at the same size in pixels, from the right-click menu.
How do I compress a PNG on a Mac?
Preview’s Adjust Size and the Finder’s Convert Image make a PNG smaller in pixels; exporting it as JPEG makes it lighter but turns it into a JPEG. Ricly keeps it a PNG at the same dimensions: with 256 colors or fewer, nothing is lost at all.
Can I compress an image without losing quality?
It depends on the picture. With Ricly, a PNG with 256 colors or fewer loses nothing; other PNGs move by at most two levels out of 255, and a JPEG copy is kept only if it passes a check against the original. Lowering the JPEG quality in Preview or Photos is a trade you judge by eye, so compare before you send.
How do I make a photo smaller for email?
Apple says Mail inserts images at their actual size, and that when different sizes are available you can choose one from the pop-up menu on the right side of the message header. To send a lighter file whatever the app, compress it first.
How do I get an image under a size limit, like 2 MB?
Use Quick Resize › Under…, in the same Ricly menu: it keeps the size in pixels if the file already fits, and otherwise picks the largest size that does.
Is there a free image compressor for Mac?
Preview, Photos, the Finder and sips are built in, and Ricly’s Compress Image is free with no monthly limit.
Does Ricly upload my images?
No. Both encoders are inside the app and run on your Mac, and nothing is uploaded.
Compress Image in Ricly →Quick Resize →Convert HEIC to JPG on a Mac →