
Short answer
The built-in way with the fewest steps is the Finder: Control-click the photo, choose Quick Actions › Convert Image (on macOS 27, it’s under More), then pick JPEG and a size. Preview (File › Export) and Photos (File › Export) do it too, and so does the Terminal with sips.
Converting a whole folder from the right-click menu? See how Ricly does it ↓
Four built-in ways, and Ricly
| Method | Where | Many at once | Price |
|---|---|---|---|
| Finder | Right-click › Quick Actions › Convert Image | Select several photos | Built in |
| Preview | File › Export, Format: JPEG | Open them in one window, select them in the sidebar | Built in |
| Photos | File › Export › Export Photos, Photo Kind: JPEG | Select them in your library | Built in |
| Terminal | sips -s format jpeg | With a script | Built in |
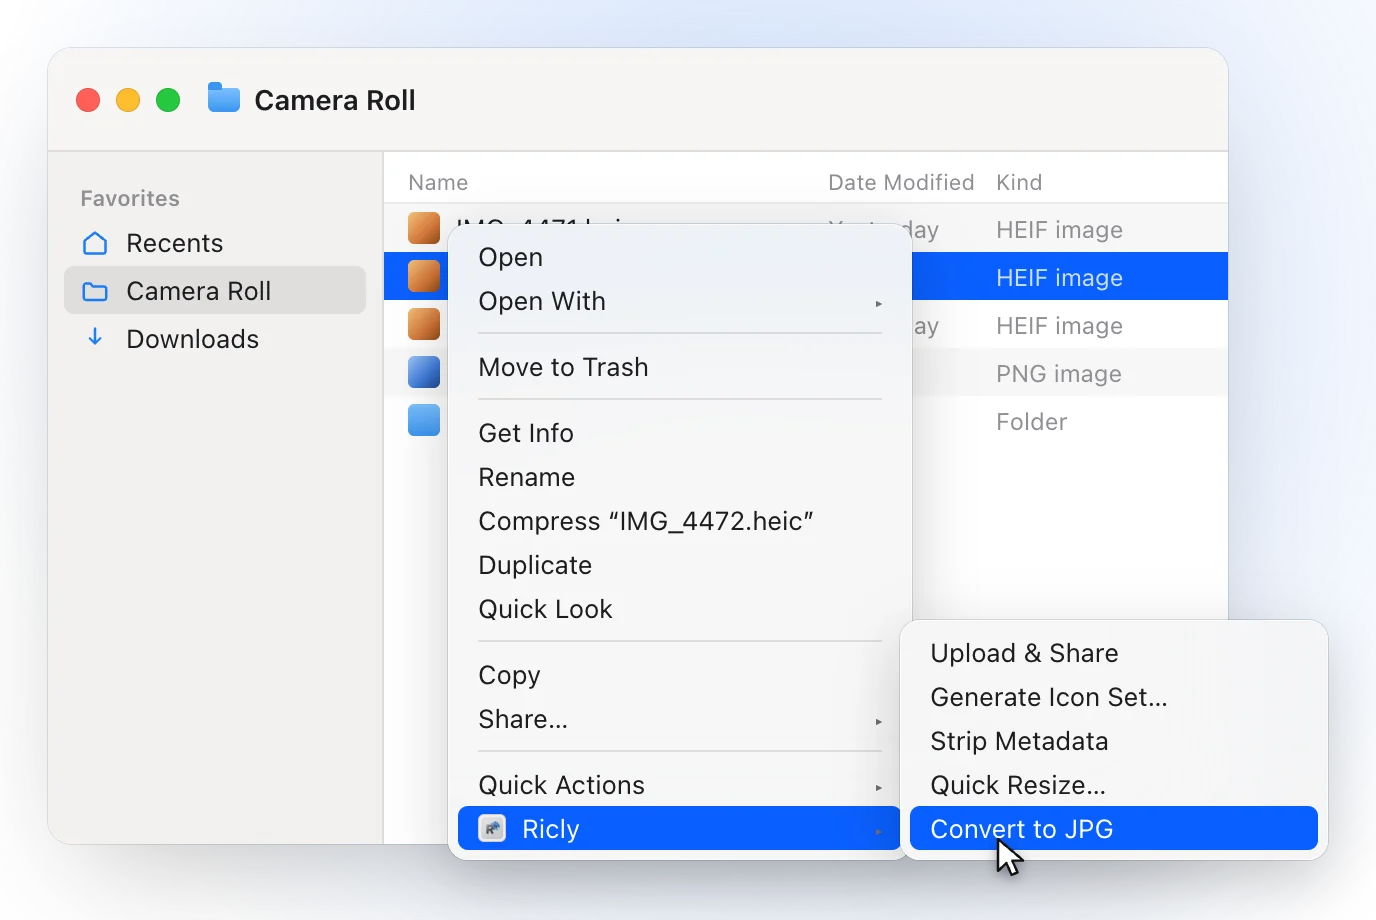
 Ricly Ricly | Right-click › Ricly › Convert to JPG | Select them all, right-click once | Free, no monthly limit |
Convert HEIC to JPG in the Finder (built in)
- Control-click the photo in the Finder.
- Choose Quick Actions › Convert Image.
- Pick JPEG and a size.
What it does. Apple gives HEIC to JPEG or PNG as its own example. Which Quick Actions you see depends on the file type and the Finder extensions you have turned on.
Convert HEIC to JPG in Preview (built in)
- Open the photo in Preview, then choose File › Export.
- Set Format to JPEG.
- Choose a name or a location, then click Save.
Several photos: open them in one Preview window, select them in the sidebar, then follow the same steps.
Convert HEIC to JPG in Photos (built in)
- In Photos, select the photos.
- Choose File › Export › Export Photos.
- Set Photo Kind to JPEG, then click Export and choose where to save them.
Photos also offers a JPEG quality and a size before you export.
Convert HEIC to JPG in the Terminal
macOS includes sips. For one photo, run:
sips -s format jpeg photo.heic --out photo.jpg
It’s free and scriptable, if you’re comfortable in the Terminal.
The right-click way
Convert HEIC to JPG with Ricly
- Install Ricly and open it. Turn on the Finder extension when it asks (one setting), then create your free account and verify your email.
- In Finder, select the photos and right-click: choose Ricly › Convert to JPG.
- Each JPG lands next to its original, with the same name.
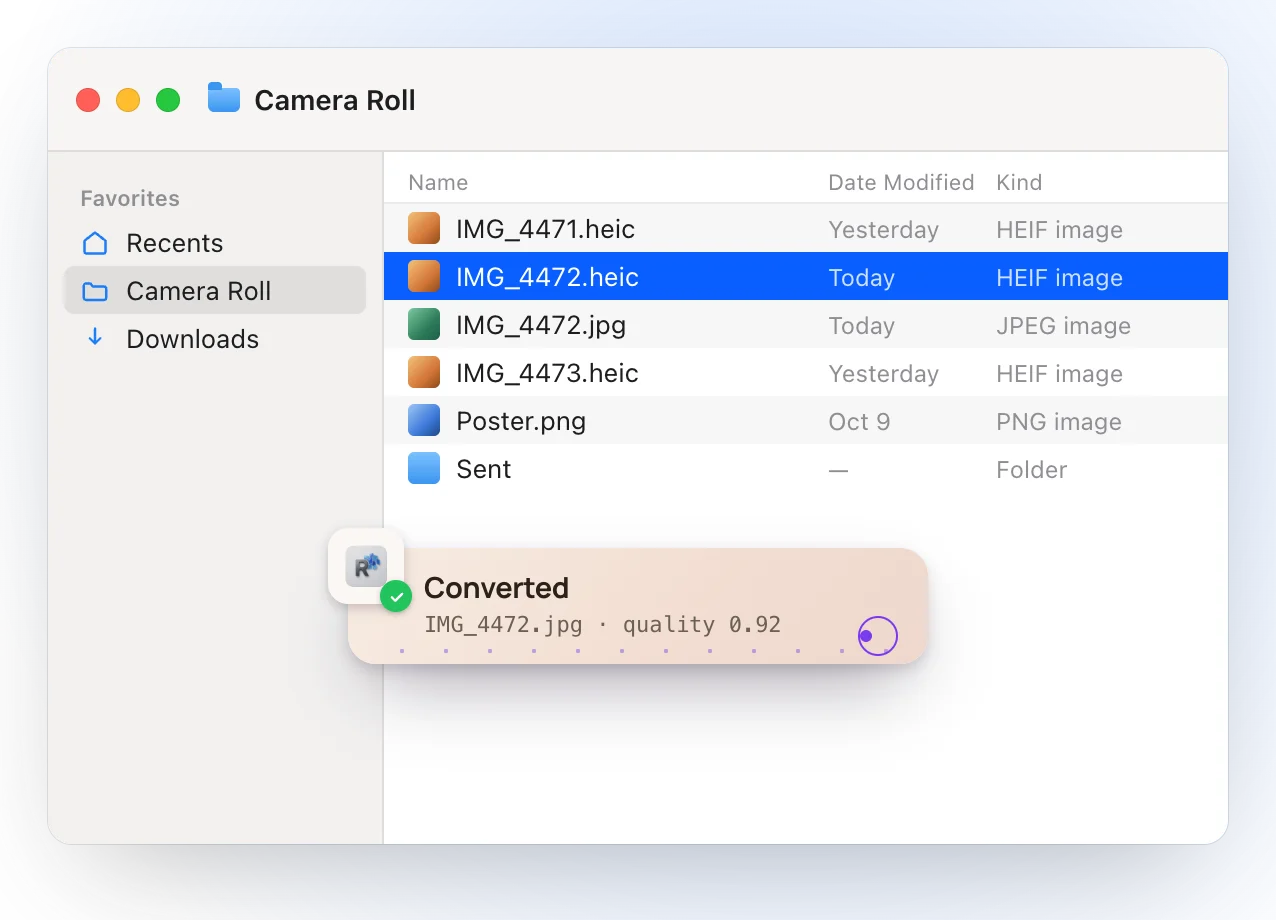
- Quality 0.92, whichever plan you are on.
- The date, the camera and the orientation are kept in the JPG.
- Each JPG lands next to its original, with the same name, and never replaces a JPG that is already there: you get a numbered file instead.
- HEIC, HEIF and WebP all work; a transparent WebP lands on white.
- Four photos at a time, and no monthly limit.
- Everything happens on your Mac. Nothing is uploaded.
Where it falls short. It makes JPG only (for PNG, use the Finder’s Convert Image or Preview). JPG is a lossy format, so there is a conversion. It needs macOS 13 or later.
Convert many HEIC photos to JPG at once
In Ricly, open the folder, select the photos (⌘A selects everything in the window) and right-click once: every photo gets its own JPG beside it. Built in, you can select several photos for the Finder’s Convert Image, export several from Preview’s sidebar or from Photos, or loop sips in a script.
Stop your iPhone from shooting HEIC
On your iPhone, go to Settings › Camera › Formats and choose Most Compatible: new photos are saved as JPEG. Apple also notes that photos imported from an iPhone into Photos or Image Capture might be converted to JPEG, unless Settings › Apps › Photos is set to Keep Originals.
Which one should you use?
Converting HEIC to JPG on a Mac: common questions
Can I convert HEIC to JPG without losing quality?
Not entirely: JPG is a lossy format. Ricly encodes at quality 0.92, and your HEIC stays where it is. If you need no loss at all, the Finder’s Convert Image and Preview can make a PNG, which is lossless.
Does converting keep the date and location?
In Ricly, yes: the EXIF data and the orientation are carried into the JPG. Strip Metadata, in the same menu, removes them before you share.
How do I convert HEIC to JPG on a Mac for free?
The Finder, Preview, Photos and sips are built in, and Ricly’s HEIC to JPG is free with no monthly limit.
Why are my iPhone photos HEIC?
Your iPhone’s camera is set to High Efficiency. Choose Most Compatible in Settings › Camera › Formats to shoot JPEG instead.
Can I convert HEIC to JPG in the Terminal?
Yes, with sips: run sips -s format jpeg photo.heic --out photo.jpg in the Terminal.
What about Live Photos?
The still image is converted. A JPG cannot hold the motion part, whichever tool you use.
Does Ricly upload my photos?
No. The conversion runs on your Mac, and nothing is uploaded.