
Short answer
In Preview, choose Tools › Adjust Size, select Scale proportionally, then enter a width or a height. To resize many at once, open them in one Preview window and select them in the sidebar first. Photos, the Finder’s Convert Image, Automator and the Terminal (sips) do it too.
Rather right-click a folder and set the size once? See how Ricly does it ↓
Six ways at a glance
| Method | Where | Sizes you can set | Many at once | Price |
|---|---|---|---|---|
| Preview | Tools › Adjust Size | Width and height, a percentage, or Fit into | Select them in the sidebar | Built in |
| Photos | File › Export, Size | A size for the exported copy | Select them in your library | Built in |
| Finder | Quick Actions › Convert Image | A smaller size, in the format you pick | Select several images | Built in |
| Automator | A Quick Action with Scale Images | The longer side in pixels, or a percentage | Every image you select | Built in |
| Terminal | sips -Z | The longer side in pixels | With a script | Built in |
 Ricly Ricly | Right-click › Ricly › Quick Resize… | 25, 50 or 75 %, a width or a height in pixels, or a file size | Select them all, right-click once | Free, no monthly limit |
Resize an image in Preview (built in)
- Open the image in Preview, then choose Tools › Adjust Size.
- Select Scale proportionally, so that the other side follows when you change one.
- Enter a width or a height, or choose a size from the Fit into menu. For a percentage, choose percent next to the Width and Height fields.
Several images: open them in one Preview window, select them in the sidebar, then choose Tools › Adjust Size.
Steps from Apple’s Preview guide: Crop, resize, or rotate an image.
Good to know. Apple notes that changes to a Preview document are saved automatically, so duplicate the picture first if you want to keep the original (File › Duplicate in the Finder). Preview shows the resulting file size as you set the dimensions.
Resize photos in Photos (built in)
- In Photos, select the photos.
- Choose File › Export › Export Photos.
- Click the arrow beside Photo Kind, then choose a Size.
- Click Export and choose where to save them.
Your originals stay in your library.
Make an image smaller in the Finder (built in)
- Control-click the image in the Finder.
- Choose Quick Actions › Convert Image (under More on macOS 27).
- Pick a format and a size.
Apple describes it as converting an image to another format or a smaller size.
Batch resize images with Automator (built in)
Build it once, and it sits in the Finder from then on.
- Open Automator, choose File › New, select Quick Action, then click Choose.
- Set Workflow receives current to Image files.
- Add the Scale Images action. Automator offers to add Copy Finder Items, so that copies are changed and your originals are preserved: click Add, and choose where the copies go.
- Set the size, then choose File › Save and give it a name.
To use it, select images in the Finder, Control-click, and choose it under Quick Actions.
Steps from Apple’s Automator guide: Use Quick Action workflows on Mac.
Good to know. Scale Images resizes by the longer side in pixels or by a percentage of the current size. Without Copy Finder Items, it changes the images you pass to it.
Resize an image in the Terminal
macOS includes sips. To fit a picture in 1200 pixels on its longer side, run:
sips -Z 1200 photo.jpg --out photo-1200.jpg
Our 2000 × 1332 test photo came out at 1200 × 799. We tried it on macOS 15.7.
The right-click way
Resize images with Ricly
- Install Ricly and open it. Turn on the Finder extension when it asks (one setting), then create your free account and verify your email.
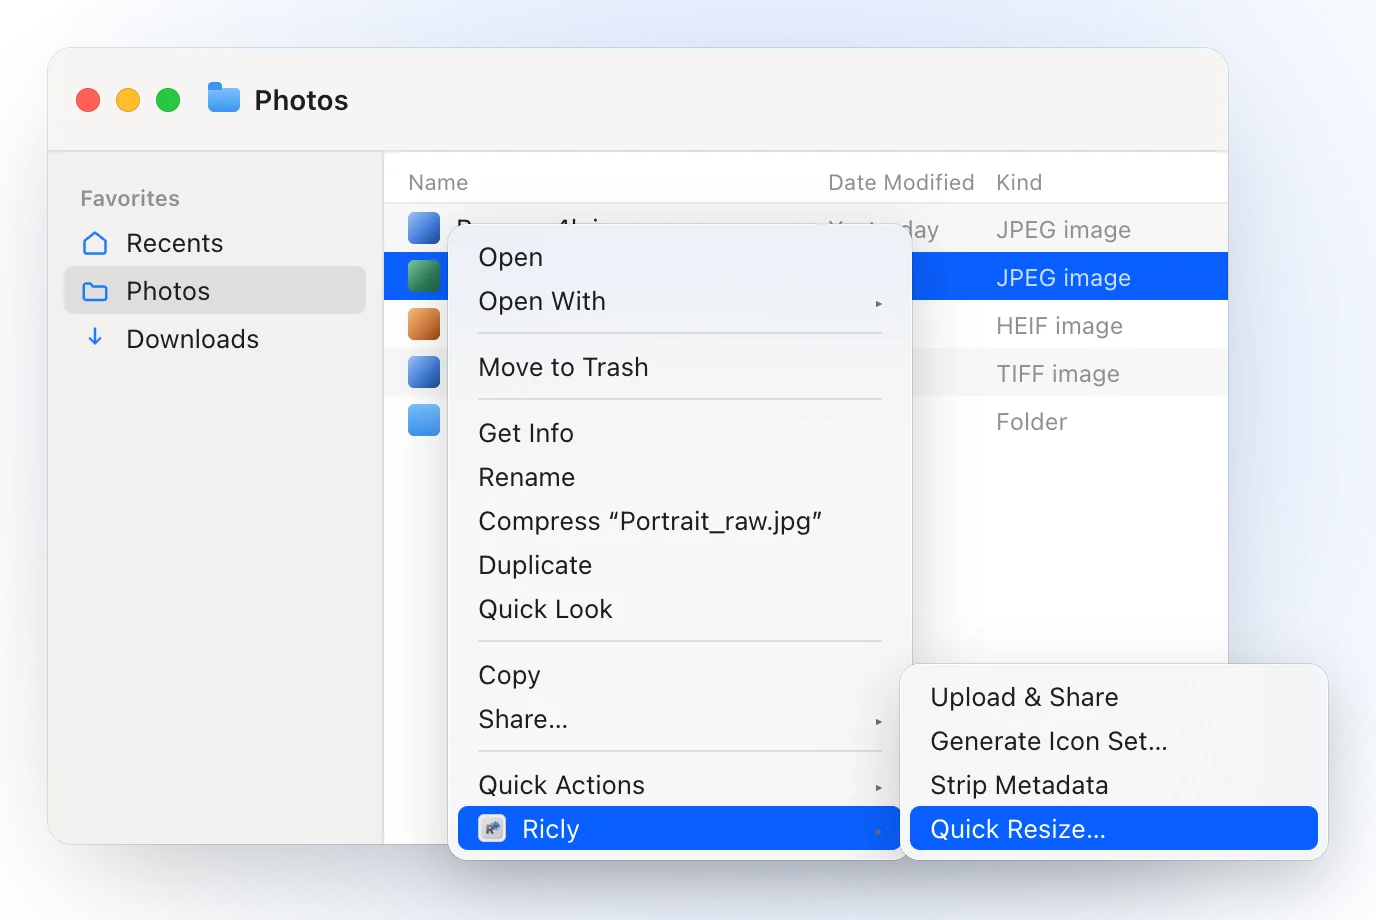
- In Finder, select the pictures and right-click: choose Ricly › Quick Resize….
- Pick a percentage, a width or a height, or a file size to stay under. Each copy lands next to its original.
![The Finder after resizing: Portrait_raw [1200x1500].jpg appears next to Portrait_raw.jpg, and a Ricly notice reads Resized, from 4000 × 5000](/v2a/guide-resize-ricly-result.webp)
- 25, 50 or 75 %, or a width or a height in pixels, and the other side follows the ratio.
- Under… a file size, from 500 KB to 10 MB or one you type: Ricly keeps the size in pixels if the file already fits at JPEG quality 0.85, and otherwise picks the largest size that does.
- Unlink width and height to fill a frame: Crop, framed on the subject when Ricly finds one, Fit, with margins, or Stretch.
- A PNG stays a PNG; everything else comes out as JPEG at quality 0.92, or 0.85 under a file size.
- The camera, lens, date and orientation are kept.
- Each copy is named after its new size, like Portrait_raw [1200x1500].jpg, and lands next to the original, which is never touched. Nothing is overwritten if the name is taken.
- Four images at a time, and no monthly limit.
- Everything happens on your Mac. Nothing is uploaded.
Where it falls short. HEIC, WebP, TIFF and BMP come out as JPEG. Scaling a small picture up makes it softer: the panel warns you first, and Upscale Image, a Pro tool in the same menu, is the one for a sharp enlargement. It needs macOS 13 or later.
Resize an image to a file size
Forms often count in megabytes, not pixels. In Preview, the resulting file size shows as you change the dimensions, so you try a size and check. In Ricly, choose Under… and the limit, like 2 MB: it keeps the size in pixels if the file already fits, and otherwise writes the largest size that does, in one go.
Resize many images at once
In Ricly, open the folder, select the images (⌘A selects everything in the window) and right-click once: the menu reads Quick Resize (20 files), you set the size once, and every copy follows it, each named after its own new dimensions. Built in, you can select several images in Preview’s sidebar, in Photos or in the Finder, run an Automator Quick Action, or loop sips in a script.
Which one should you use?
Resizing images on a Mac: common questions
How do I resize an image on a Mac?
In Preview, choose Tools › Adjust Size, select Scale proportionally and enter a width or a height. With Ricly, right-click the picture, choose Quick Resize… and pick a size: the copy lands next to the original.
How do I resize multiple images at once on a Mac?
In Preview, open them in one window, select them in the sidebar, then choose Tools › Adjust Size. Automator can turn Scale Images into a Quick Action. With Ricly, select them all, right-click once and set the size once.
How do I resize an image to an exact width and height?
In Preview, deselect Scale proportionally and enter both values; if the shape changes, the picture is stretched. In Ricly, unlink width and height and choose Crop, Fit or Stretch.
How do I make an image smaller than 2 MB?
Choose Quick Resize › Under… › 2 MB in Ricly: it keeps the size in pixels if the file already fits, and otherwise picks the largest size that does. In Preview, change the dimensions until the resulting size is under the limit.
Can I resize an image in the Terminal?
Yes, macOS includes sips: sips -Z 1200 photo.jpg --out photo-1200.jpg fits the picture in 1200 pixels on its longer side.
Does resizing reduce image quality?
Making a picture smaller keeps fewer pixels, so it holds less detail up close. Ricly saves JPEGs at quality 0.92 (0.85 under a file size), and a PNG stays a PNG. Making a picture bigger adds pixels, not detail.
Does Ricly upload my images?
No. The resizing runs on your Mac, and nothing is uploaded.
Quick Resize in Ricly →Compress images on a Mac →Strip Metadata →