
Short answer
Preview makes a picture bigger: choose Tools › Adjust Size, select Resample image, then enter a bigger size. sips does it in the Terminal. Both resample the pixels the picture already has, so no new detail appears. Ricly’s Upscale Image runs Real-ESRGAN, a model that reconstructs edges and texture, on your Mac.
Want ×2 or ×4 from a model, on your Mac? See how Ricly does it ↓
Three ways at a glance
| Method | Where | How it enlarges | Price |
|---|---|---|---|
| Preview | Tools › Adjust Size, Resample image | Resamples the pixels it has | Built in |
| Terminal | sips -Z | Resamples the pixels it has | Built in |
 Ricly Ricly | Right-click › Ricly › Upscale Image… | A model reconstructs edges and texture, ×2 or ×4 | Pro |
Bigger, or more detailed?
Making a picture bigger and adding detail are two different jobs. Resampling, what Preview and sips do, spreads the pixels a picture already has over a larger size: the picture gets bigger, and softer up close. A model like Real-ESRGAN reconstructs edges and texture the way they usually look, which can look sharper, but it’s a guess: on a face or a license plate, treat the result as a plausible image, not as evidence.
Make an image bigger in Preview (built in)
- Open the image in Preview, then choose Tools › Adjust Size.
- Select Scale proportionally and Resample image.
- Enter a bigger width or height, or a percentage above 100.
Apple notes that changes to a Preview document are saved automatically, so duplicate the picture first if you want to keep the original.
Steps from Apple’s Preview guide: Crop, resize, or rotate an image.
Make an image bigger in the Terminal (built in)
sips -Z 1600 photo.jpg --out photo-1600.jpg
That fits the picture in 1600 pixels on its longer side, bigger or smaller. We took a 400 × 300 copy of a photo on macOS 15.7, and sips gave us 1600 × 1200.
The right-click way
Upscale an image with Ricly
- Install Ricly and open it. Turn on the Finder extension when it asks (one setting), create your free account, then switch to Pro and, in Ricly › Modules, click Enable on Upscale Image.
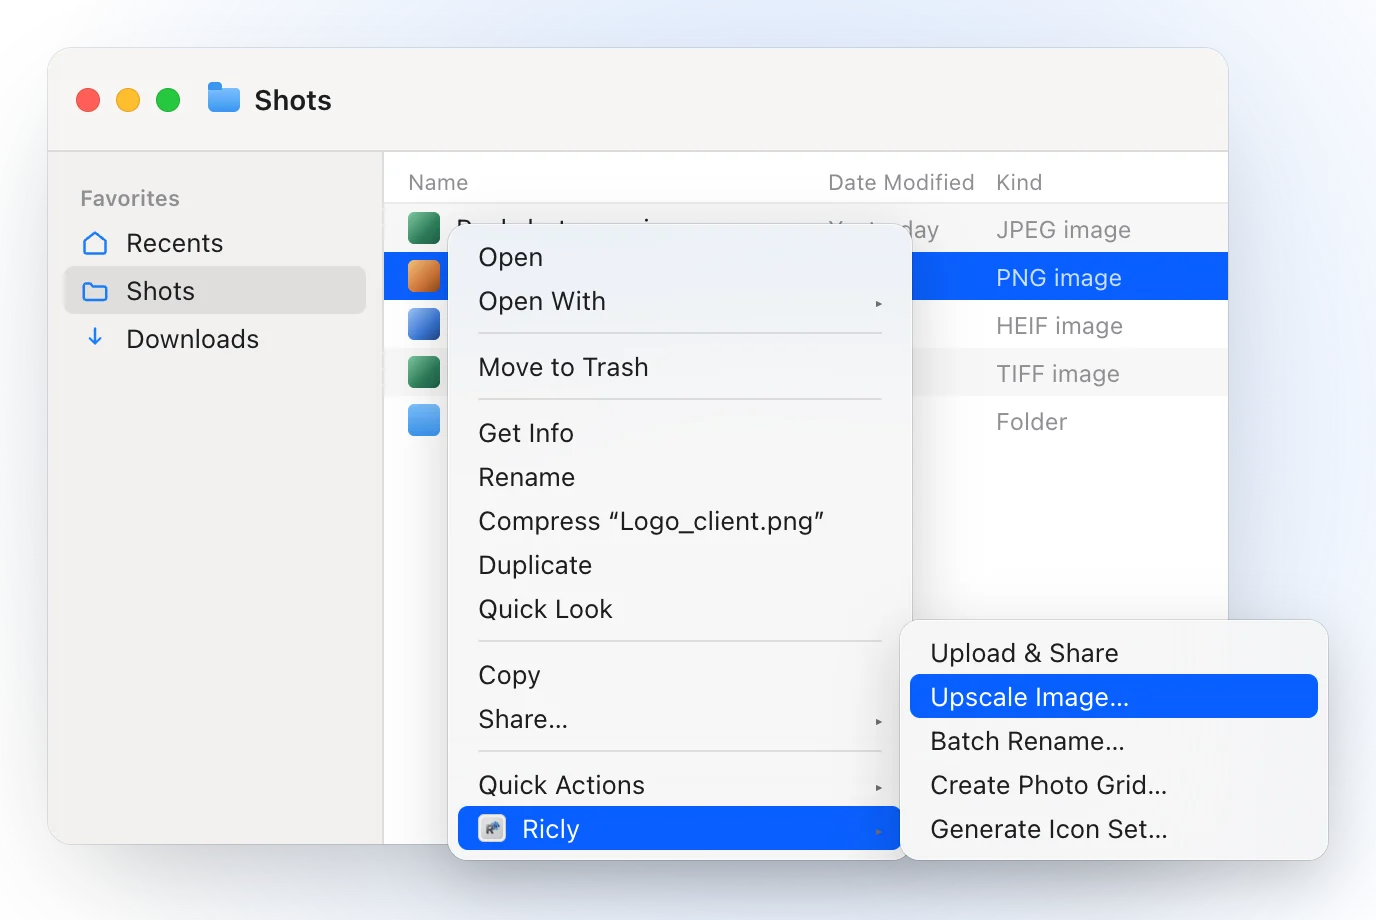
- In Finder, right-click the picture and choose Ricly › Upscale Image….
- Pick ×2 or ×4: the enlarged copy lands next to the original, named -2x or -4x.
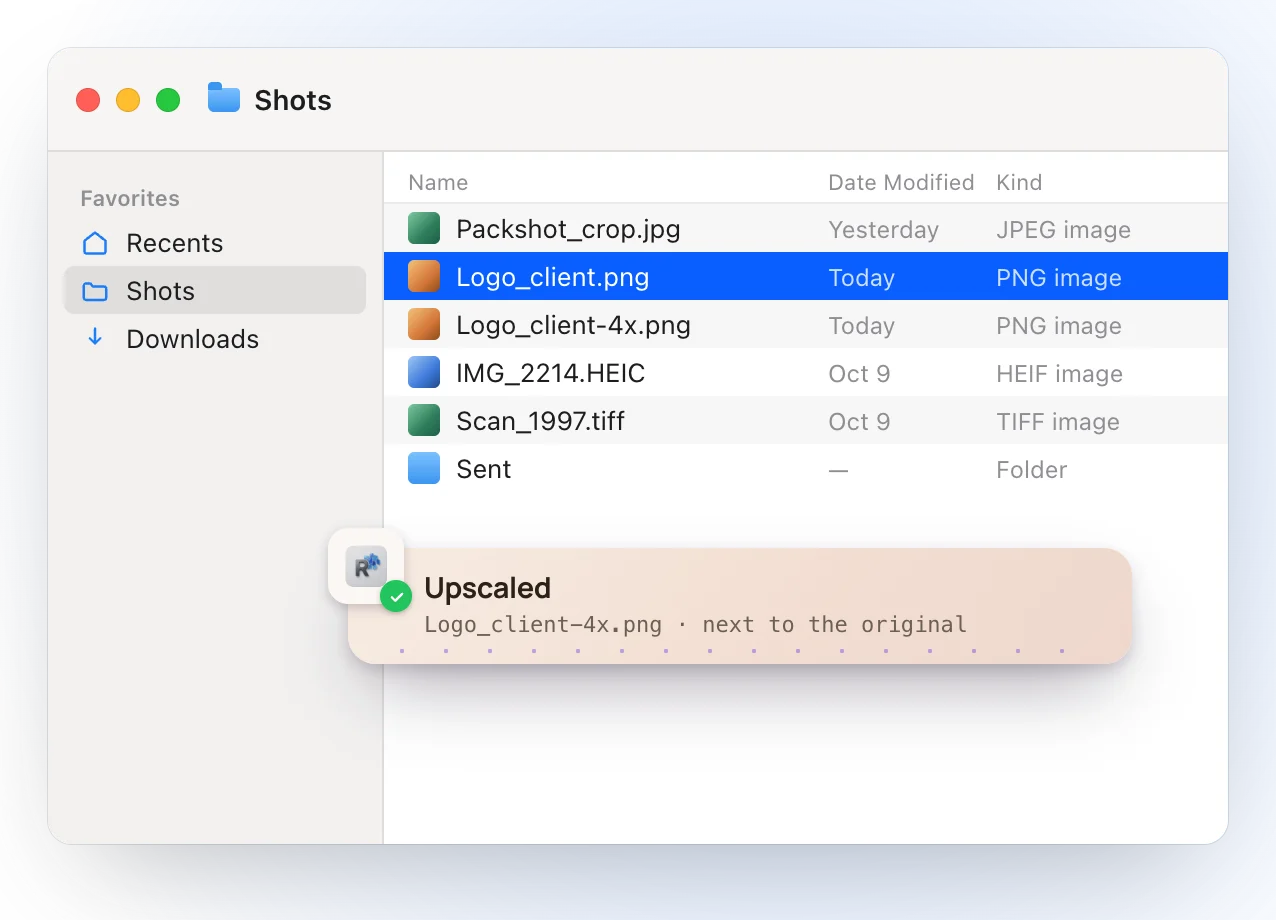
- It runs Real-ESRGAN, an open model, through Core ML. The model ships inside the app, and the picture never leaves your Mac.
- Lines of text Ricly detects under 16 pixels tall are enlarged with Lanczos instead of by the model, so small text keeps its real letters.
- A JPG comes out as a JPG at quality 0.95; a PNG, a HEIC, a WebP, a TIFF or a BMP comes out as a PNG, with its transparency kept.
- Several pictures are rendered one at a time, each with its own copy beside it.
- For a plain enlargement, free, Quick Resize in the same menu takes a bigger size too, and warns you first that it adds pixels, not detail.
Where it falls short. It’s a Pro tool. ×4 is the largest step. The result is a reconstruction, not a recovered original. It needs macOS 13 or later.
How big does it get?
×2 doubles each side, so four times the pixels; ×4 makes each side four times longer, so sixteen times the pixels. A 400 × 400 logo comes out at 1600 × 1600 with ×4.
Which one should you use?
Upscaling images on a Mac: common questions
How do I make an image bigger on a Mac?
In Preview, choose Tools › Adjust Size, select Resample image and enter a bigger size. In the Terminal, sips -Z 1600 photo.jpg --out photo-1600.jpg. Ricly’s Upscale Image enlarges ×2 or ×4 with a model.
What’s the difference between resizing and upscaling?
Resizing resamples the pixels a picture has; upscaling with a model like Real-ESRGAN reconstructs edges and texture. Both give you more pixels; only the model tries to fill them with detail.
Does enlarging an image reduce its quality?
Resampling makes a bigger picture that looks softer up close, because no detail is added. A model reconstructs edges and texture, so the result can look sharper, but its detail is reconstructed, not recovered.
Does the upscaling run on my Mac or in the cloud?
With Ricly, on your Mac: the model ships inside the app and runs through Core ML.
Can I upscale ×8?
Not in Ricly: ×4 is the largest step for now.
Will it work on a logo with small text?
Ricly detects lines of text under 16 pixels tall and enlarges them with Lanczos, so their letters aren’t re-invented by the model.
Is there a free way to upscale an image on a Mac?
Preview and sips are built in, and Ricly’s Quick Resize makes a plain enlargement for free. Upscale Image, with the model, is Pro.
Upscale Image in Ricly →Resize images on a Mac →Make app icons and favicons on a Mac →