
Short answer
The built-in way: open the PDF in Preview, choose File › Export, set Quartz Filter to Reduce File Size, and save. It’s free and takes a few seconds. Check the size of the new file before you send it: on some scans, it comes out bigger.
Rather do it from the right-click menu, and see the exact size before you click? See how Ricly does it ↓
Three ways at a glance
| Method | Where | Settings | If the result is bigger | Password-protected PDF | Price |
|---|---|---|---|---|---|
| Preview | File › Export | One filter preset | Saves it anyway | Yes, once you type the password | Built in |
| Shortcuts Quick Action | Right-click in Finder | None | Not tested by us | Not tested by us | Built in |
 Ricly Ricly | Right-click in Finder | Screen or Print, each size shown before you click | Keeps your original and tells you | No: remove the password first | 5 PDFs a month free, unlimited with Pro |
Compress a PDF with Preview (built in)
- Open the PDF in Preview.
- Choose File › Export.
- In the Quartz Filter menu, choose Reduce File Size.
- Give the file a new name so your original stays as it is, then click Save.
What it does. Reduce File Size is a single preset. Every image is resampled to 144 pixels per inch at the size it’s shown on the page, up to 2400 pixels, and usually re-saved as JPEG. Text and vector shapes are left alone: in our test, the text came out identical.
Depending on your version of macOS, the Export window also has checkboxes such as Optimize images for screen and Save images as JPEG; Apple lists them in its Preview guide. We tested the Reduce File Size filter only.
Where it does well. It’s already on your Mac, it handles a password-protected PDF once you type the password, and it keeps your text sharp. On our 42 MB demo deck, it made a 14.2 MB file.
Where it falls short. It doesn’t check the result. On our scanned letter, Reduce File Size turned 367 KB into 1.9 MB, and a 49 KB text report came out at 82 KB. And the filter is one preset: you don’t choose a lighter setting for email or a sharper one for print, and you don’t see the size before you save.
Compress a PDF from the right-click menu with Shortcuts
macOS has a Shortcuts action called Optimize File Size of PDF. Build a shortcut around it, turn on Use as Quick Action, and it shows up when you right-click a PDF in Finder. It has no settings. Apple says it compresses the images inside the PDF, and that if they’re already compressed, it might not make a measurable difference. We haven’t measured it.
For more control, Automator’s Apply Quartz Filter to PDF Documents action can run a filter you build yourself in ColorSync Utility, with the resolution and JPEG quality you pick. It takes some setting up, and it doesn’t check the result either.
The right-click way
Compress a PDF with Ricly
- Install Ricly and open it. Turn on the Finder extension when it asks (one setting), then create your free account and verify your email.
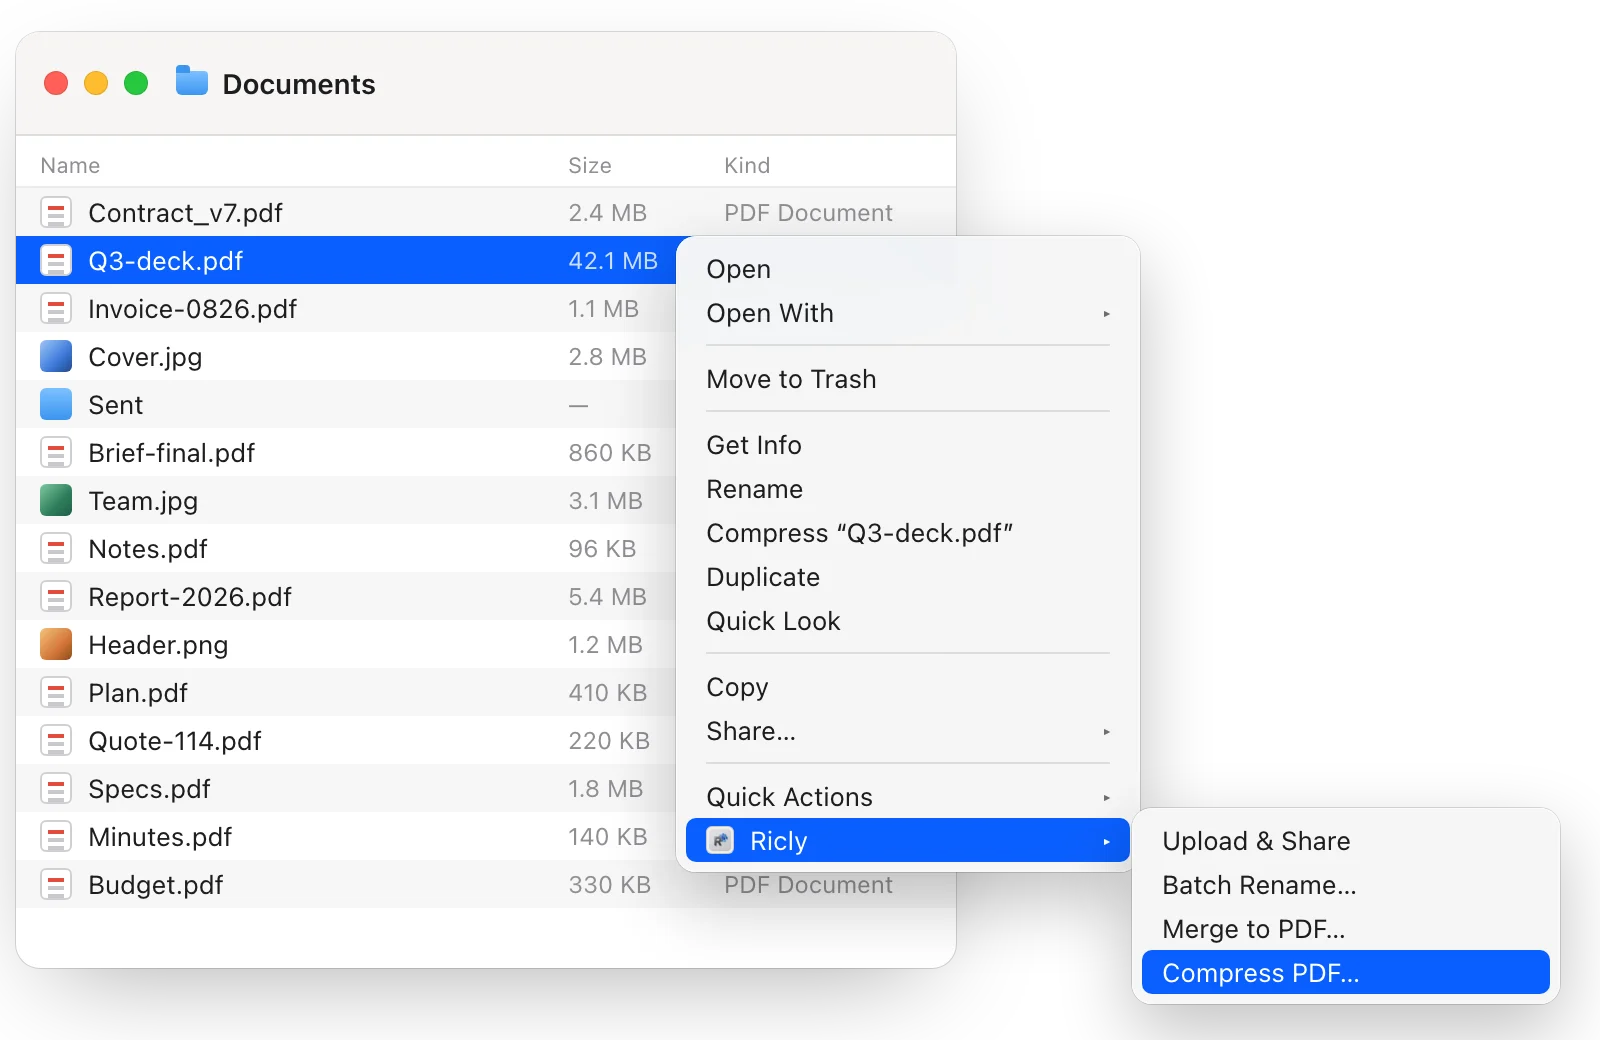
- In Finder, right-click the PDF and choose Ricly › Compress PDF.
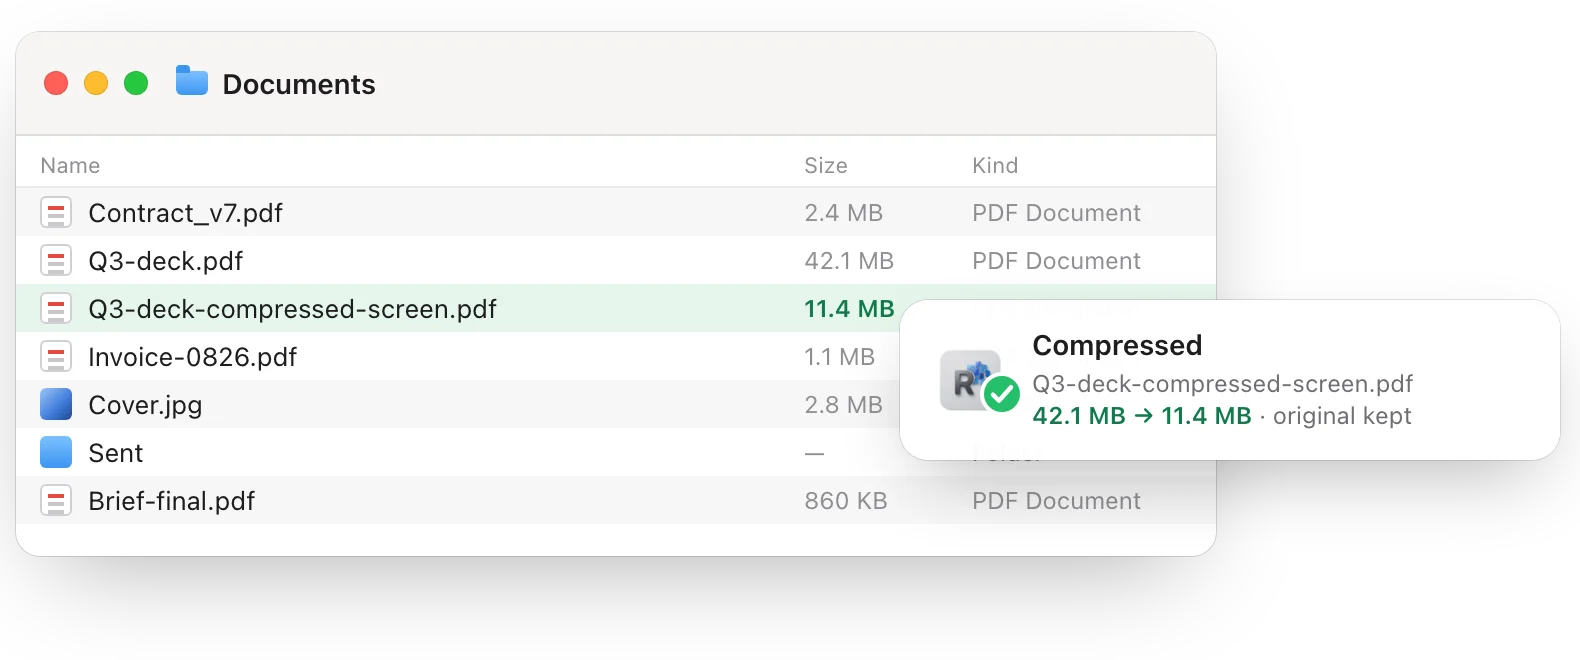
- Ricly measures your file and shows the exact size of Screen (for email and the web) and Print, plus other sizes it has measured. On a big PDF, that takes a few seconds. Click one: the lighter copy lands next to the original.
What our test showed.
The same area of our demo deck at 200% zoom. Photos in the test deck: Unsplash.
- Preview’s Reduce File Size is one preset. Ricly gives you two, Screen and Print, plus other sizes it has already measured on your file.
- Our 42 MB demo deck: 14.2 MB with Preview, 11.4 MB with Ricly Screen. At 200% zoom, you can’t tell them apart.
- Need it for print? Ricly Print keeps images at 220 pixels per inch. Preview’s preset stops at 144.
- The size Ricly shows before you click is the size you get, to the byte.
- If Ricly can’t make it smaller, it tells you and keeps your original. It never hands you a bigger file.
- On another scan in our test, Screen made it 65% lighter; Print kept the text crisper.
- Your text stays text: selectable and searchable. Your originals are never touched.
- Everything happens on your Mac. Nothing is uploaded.
Where it falls short. It doesn’t open password-protected PDFs: it asks you to remove the password first. The Free plan covers 5 PDFs a month, and a batch that goes over is refused before it starts. It needs macOS 13 or later.
Compress several PDFs at once
With Pro, select ten PDFs, right-click once, choose once. About a second later, ten lighter copies sit next to the originals. In a batch, you pick Screen or Print once; the exact sizes are shown when you compress one PDF at a time.
Can you compress a PDF without losing quality?
Not entirely: making a PDF smaller means giving something up. What you give up depends on what’s inside it.
- Text comes through unchanged. Your text stays text: selectable and searchable. In our test, the text came out identical with Preview and with Ricly.
- Images are what gets smaller. Preview’s Reduce File Size resamples every image to 144 pixels per inch at the size it’s shown on the page. Ricly gives you two settings: Screen, for email and the web, and Print, which keeps images at 220 pixels per inch.
- Compare before you send. On our 42 MB demo deck: 14.2 MB with Preview, 11.4 MB with Ricly Screen, and at 200% zoom you can’t tell those two apart. On a scan, Screen makes it much lighter; Print keeps the text crisper.
To keep the most detail: choose Print in Ricly, keep the original, and zoom to 200% on a photo before you send anything important. Preview keeps your text sharp too; the difference is the choice of setting, and the safety net: if Ricly can’t make a file smaller, it tells you and keeps your original.
Which one should you use?
How we tested. On macOS 15.7, with test PDFs we made ourselves from free stock photos. We applied Preview’s own Reduce File Size filter to the same files, measured sizes in bytes on disk, and compared sharpness at 200% zoom.
Compressing PDFs on a Mac: common questions
Why did my PDF get bigger after Reduce File Size?
Preview saves the new file whatever its size. On some scans whose images are already heavily compressed, the filter re-saves them in a lossless format, and the file grows: our 367 KB scanned letter came out at 1.9 MB. Keep the original, or use a tool that checks the result before saving it.
Why don’t I see the Quartz Filter menu in Preview?
Use File › Export: in Apple’s Preview guide, the Quartz Filter menu is in that Export window.
Why is Reduce File Size not making my PDF smaller?
A PDF that is mostly text, or whose images are already small, has little left to remove. Our 49 KB text report came out at 82 KB.
How do I compress a PDF without losing quality?
Text and vector shapes lose nothing with Preview or Ricly: only the images are resampled. For the images, you choose how much detail to keep. Ricly Print keeps 220 pixels per inch; Preview’s preset stops at 144. Before you send something important, zoom to 200% and look. The section above shows what changes, file by file.
Can I compress a PDF on a Mac for free?
Yes. Preview and Shortcuts are built in. Ricly’s Free plan compresses 5 PDFs a month.
Can I compress a password-protected PDF?
Preview opens it once you type the password. Ricly doesn’t open it: remove the password first, then compress it.
Does Ricly upload my PDF?
No. Compress PDF runs on your Mac, and nothing is uploaded.
Compress PDF in Ricly →Merge PDFs on your Mac →Send it as a link →